Winter Candles You Can Make at Home
0 Comments
Words: Danielle Williams
Photo Credit: Kristy Doubet Haare
With the weather cooling down and the sun setting earlier each day, it’s time to infuse wintry candles into your evening routine. There’s nothing quite like winding down by candlelight, and it’s a happy bonus when you can bring the winter spirit into your home at the same time. These basic candle recipes are simple and quick to make and include some of our favorite scents for the season. Happy candle-making!
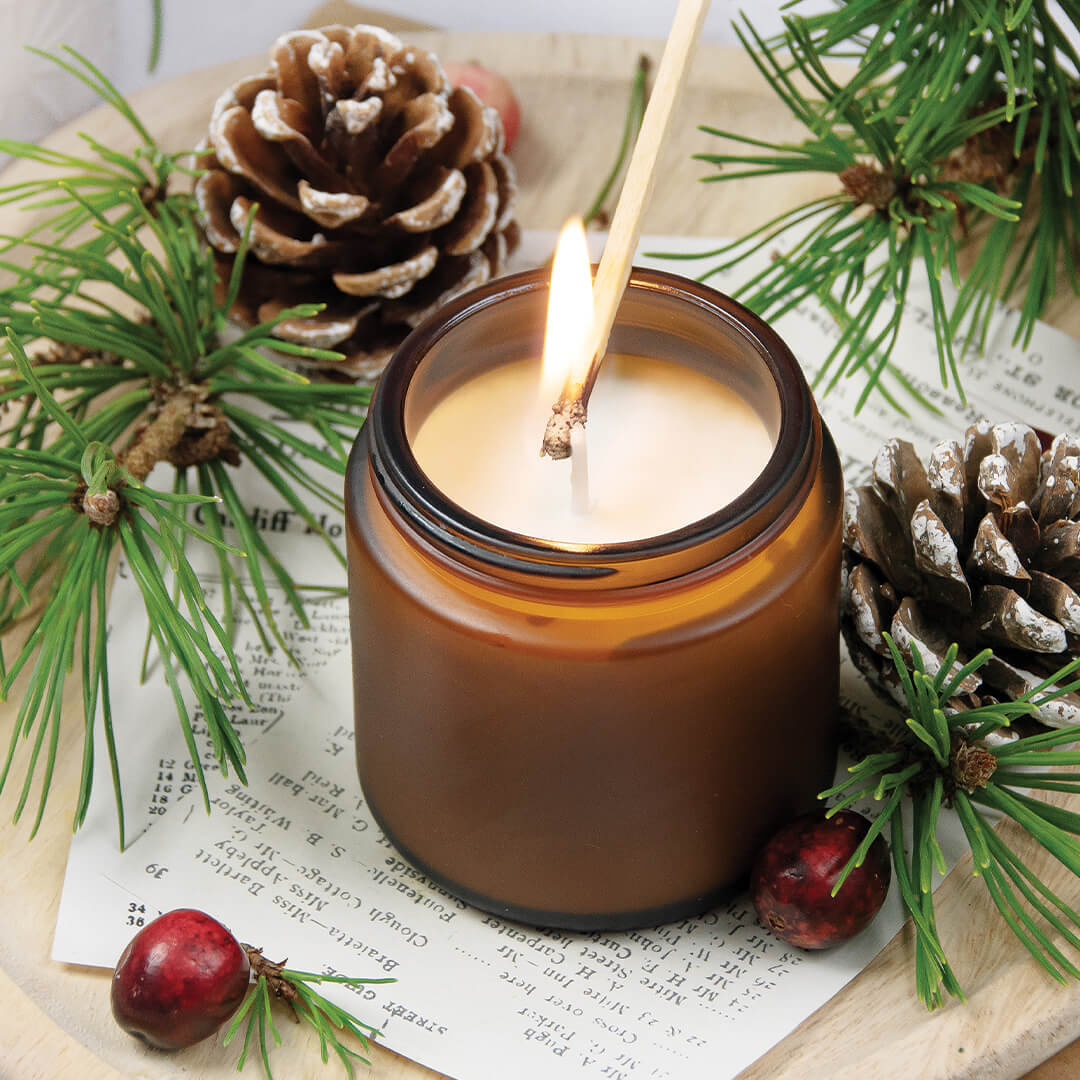
Pine-Scented Candle
by Irena Saro & Cyna Rank from Willow And Sage Winter 2023
You Will Need
Yields 4 Candles
- • Hot glue
- • Cotton wicks: pre-tabbed (4)
- • Glass jars: amber, 4-oz. (4)
- • Wick-centering tool
- • Digital scale
- • 14 oz. soy wax flakes (Golden Brands – 464 Soy Wax)
- • Saucepan/Wax-melting pot
- • Thermometer
- • 0.35 oz. pine essential oil
To Make
Apply hot glue to the wick tab and adhere it to the center of the jar. Make sure the tab lays flat against the bottom. Use a wick-centering tool to keep the wick upright and in place. Measure the wax and transfer it to a saucepan or melting pot. Warm the wax over medium heat, stirring occasionally until melted and 185 degrees Fahrenheit. Remove the wax from the stove.
Add the pine essential oil and stir well. Let cool to 140 degrees Fahrenheit. Slowly pour the wax into the jar. Let the wax cool and solidify for four to six hours. It’s best to let them sit at room temperature so they cool gradually, as cooling candles too rapidly can lead to cracks. For the best scent throw, let the candles cure at room temperature for one to two days. Trim the wick to ½ inch before lighting the candle.
get your pine-scented candle making kit here
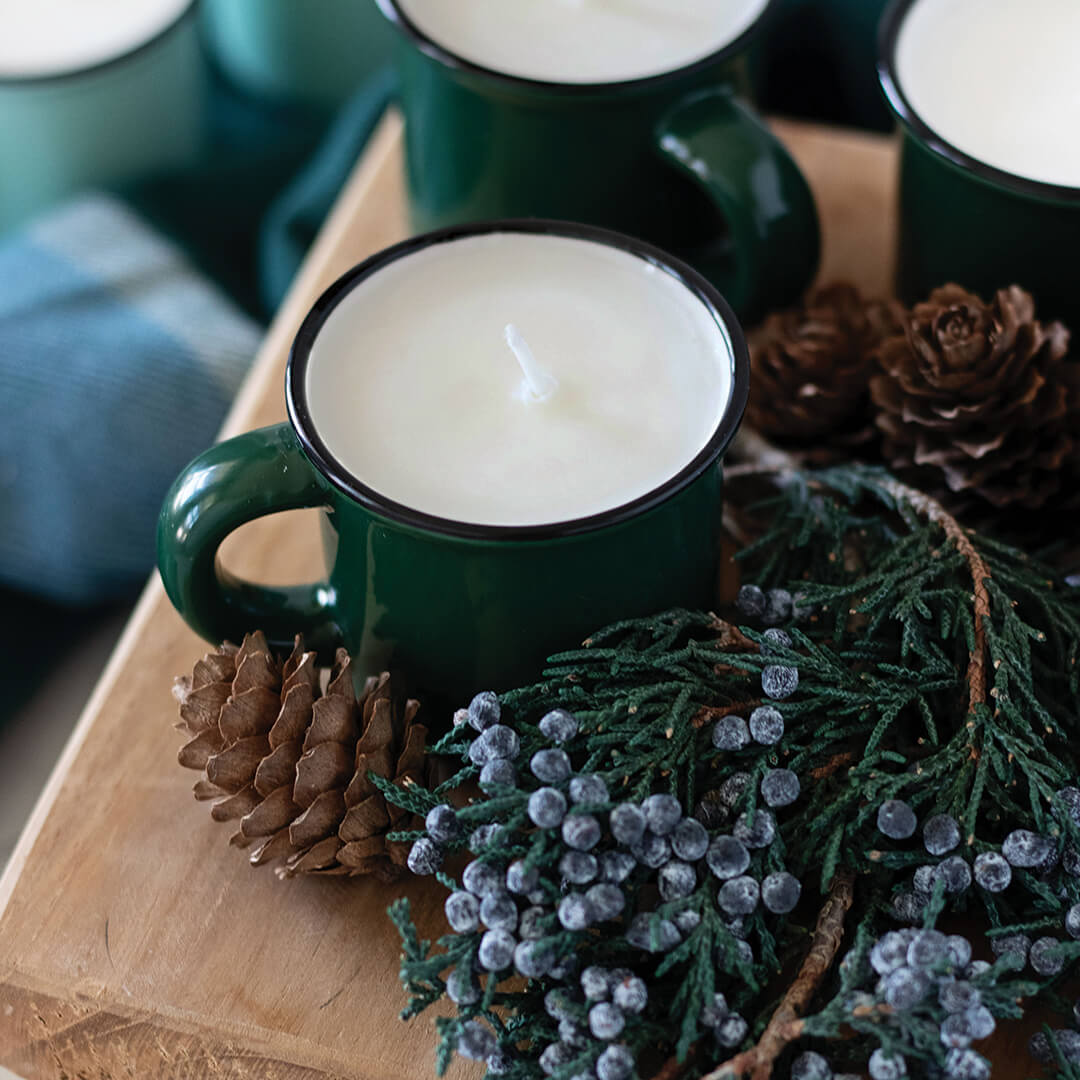
Cozy Cabin Candle Mugs
by Kristy Doubet Haare from Willow and Sage Winter 2024
You Will Need
Yields 4 Candles
- • Cotton wicks: pre-waxed (4)
- • Glue dots: large
- • Kitchen scale
- • 0.37 lbs. soy wax flakes
- • Candle-melting pitcher
- • Saucepan: large
- • Infrared thermometer
- • 5 ml clary sage essential oil
- • 2 ml myrrh essential oil
- • 5 ml lavender essential oil
- • 5 ml juniper essential oil
- • 2 ml vanilla essential oil
- • Enamel mugs: 2-oz. (4)
To Make
Secure a wick in the center of each mug with a large glue dot. Using a kitchen scale, measure the soy wax flakes. Safely melt the wax in a candle-melting pitcher seated inside a large saucepan filled with about 2 inches of water. Using the double-boiler method, heat on medium to low heat with a gentle simmer at most.
When the wax is melted and between 160–175 degrees Fahrenheit, remove the pitcher from the heat and allow the temperature of the wax to cool to between 155–145 degrees Fahrenheit before adding the clary sage, myrrh, lavender, juniper, and vanilla essential oils. Thoroughly incorporate the essential oils by stirring constantly for two minutes. Slowly pour the scented wax into each prepped mug. Allow each candle to cool for three days before lighting for the best results. Trim the wicks to approximately ¼ inch above the wax each time before burning. Keep them all to yourself or make them as gifts.
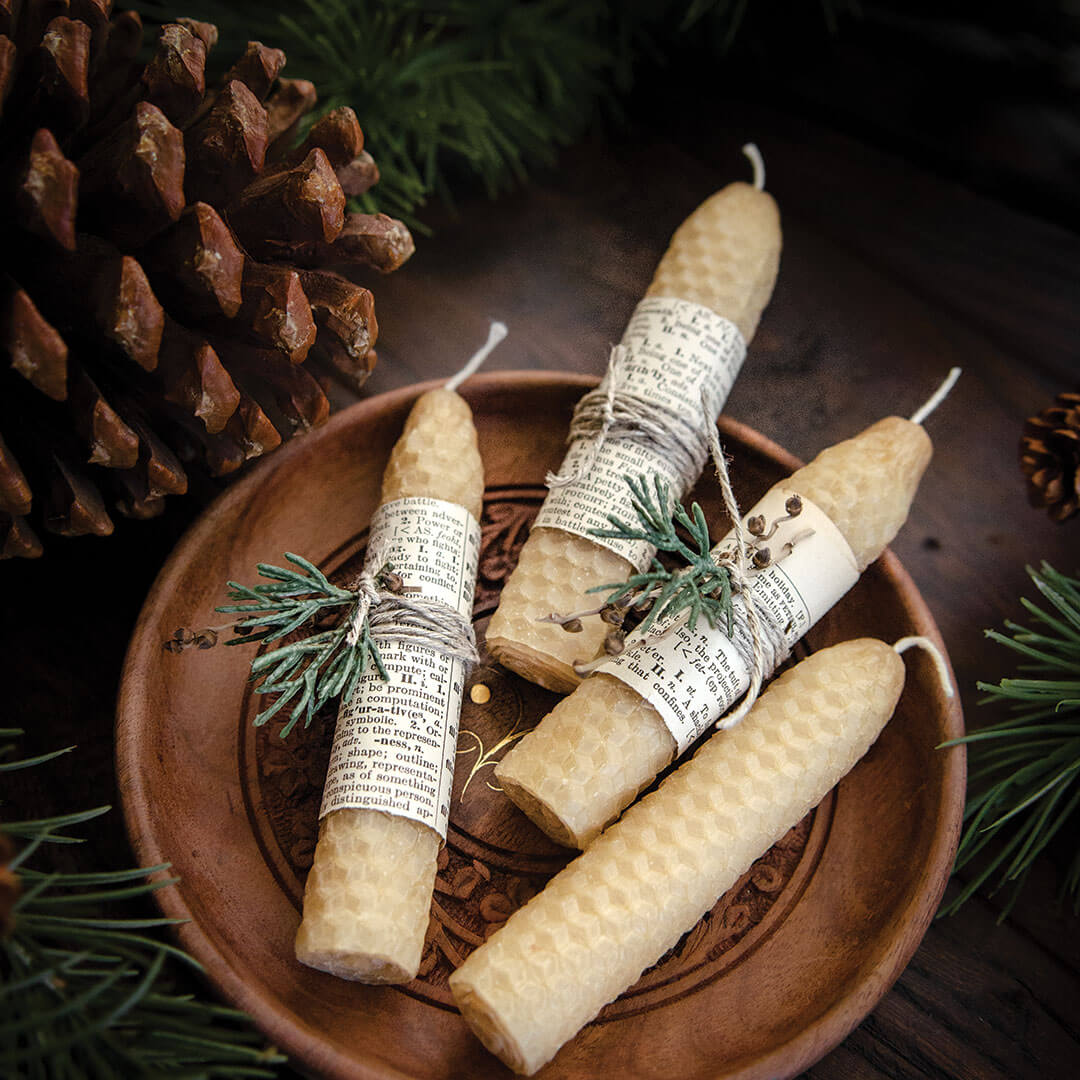
Simple but Elegant Beeswax Candles
by Christen Hammons from The Candle Issue Volume 3
You Will Need
- • Beeswax sheets
- • Scissors
- • Cotton wick
- • Book text
- • Twine
- • Greenery
To Make
Cut the beeswax sheet lengthwise to the desired height for the candle. You can also fold the sheet to that height, and when you unfold it, you’ll be able to gently tear it along the fold line. Cut a length of cotton wick that is 1 inch longer than the height of the candle. Place the wick length ⅛ inch from the short side of the beeswax sheet, and fold the sheet over the wick. Roll the beeswax sheet until you reach the desired candle circumference, and cut or tear off the excess. Use the heat of your fingers to mold the tip of the candle. Trim the wick if needed. To present as a gift, wrap the candle with a strip of book text. Tie a length of twine around the candle and tuck in some greenery.
For more information and tutorials on candle-making, check out The Candle Issue.
Danielle Williams is the managing editor for Willow and Sage, The Natural Home Issue, Mingle, and Art Quilting Studio. She lives with her growing family in Orange County, California.


